I received a couple of requests for this one, so here it is. Your complete guide to getting SEGA RALLY 3 ARCADE RUNNING ON YOUR WINDOWS 10 PC with TEKNOPARROT.
DISCLAIMER: I won’t be linking the SEGA Rally 3 Arcade dump in this tutorial. You’ll be needing it to play the game.
Obvs.
Linking it would be wrong, and I don’t want to get shut down before I even really get started. A quick Google Search will get you almost all the way there, so search for ‘Sega Rally 3 8’ at your own risk.
This tutorial is for EVERYTHING AFTER THE NAUGHTY STUFF, and assumes you’ve got the SEGA Rally file.
I’m gaming on a Windows 10 PC, so I’ve verified that it at least works on that. Let me know if you guys have any issues, but do take note that I have no way of knowing if this tutorial will work on other versions of Windows other than Windows 10
I’ve tried my best to zoom in on all the pictures here when needed, but in case you need to see it bigger, each image can be opened in a new tab or window, and you’ll be able to view them in their full-sized glory.
DOWNLOADING TEKNOPARROT:
First up, you’re going to want to download TeknoParrot.
- Head to on over to https://teknoparrot.com and click the DOWNLOAD tab on the home page:
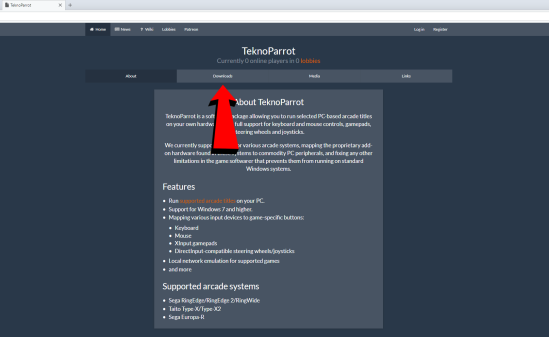
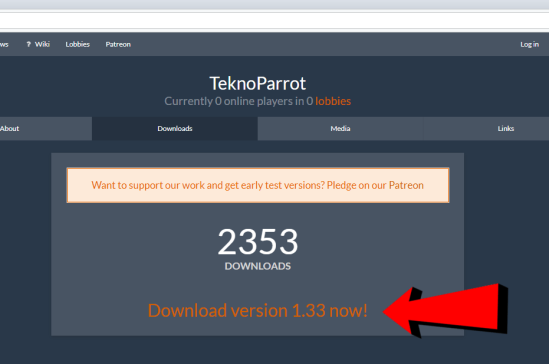
You’ll be taken to the TeknoParrot Download page. This will show the latest public release of TeknoParrot – in this case, the build is version 1.33.
- Click this to start your download, which will send the TeknoParrot_1.33.rar archive to your default Downloads directory.
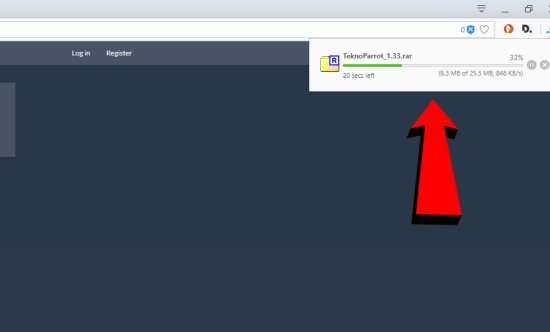
I’ve moved TeknoParrot_1.33.rar to my Desktop to make this tutorial easier to follow:
And closer:

EXTRACTING TEKNOPARROT:
You can extract TeknoParrot_1.33.rar in one of two ways:
- Double-click the program and choose a directory to send it to with your favourite program. I use 7-zip (HERE), but you can use other programs like Winrar (HERE) too, no problems. It goes without saying that you’ll need to install at least one of these to be able to extract the file.
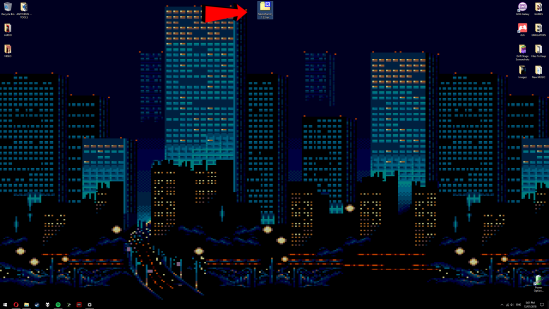
- Alternatively, do as I do and right-click the archive and extract it to the desktop. This will create a convenient folder on YOUR desktop. You can move it to whatever directory you’d like after it’s done, but for the sake of simplicity I’m keeping it on the Desktop.

You should end up with a folder called TeknoParrot_1.33 – it looks like this:

This is all you’ll need to do to get it running. TeknoParrot doesn’t need to be installed in the traditional way.
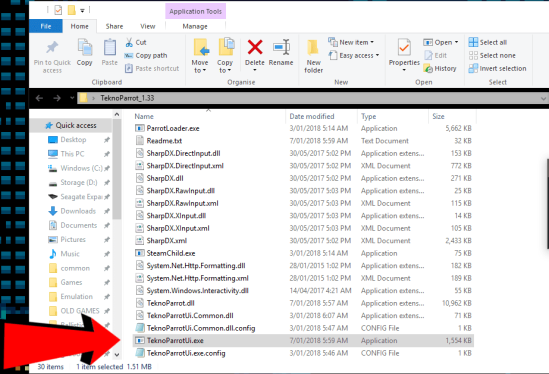
- Double click on the newly created TeknoParrot_1.33 folder to open it. The TeknoParrot executable is called TekknoParrotUi.exe
- Double click it and you’ll be greeted with this message box – ‘Seems this is your first time you are running me, please set emulation settings’ – it looks like this:
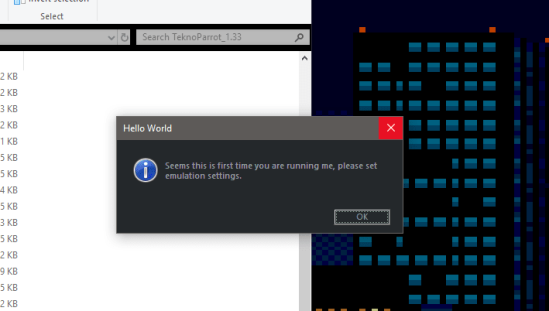
- Click OK to forward through the dialogue and open TeknoParrot.
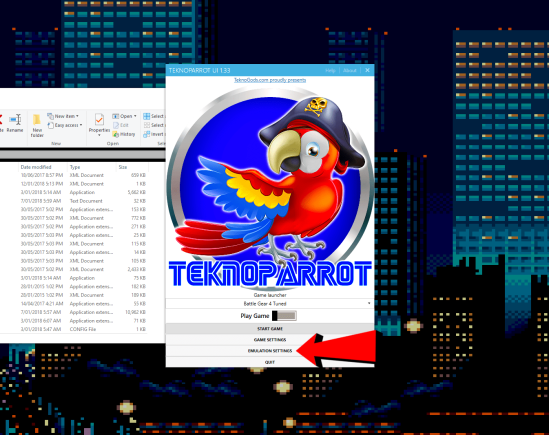
You’ll see this when it’s open:
EMULATION SETTINGS:
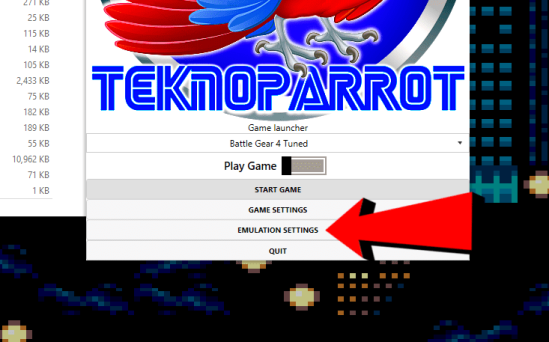
Click on Emulation Settings:
You’ll get a screen that looks like this:
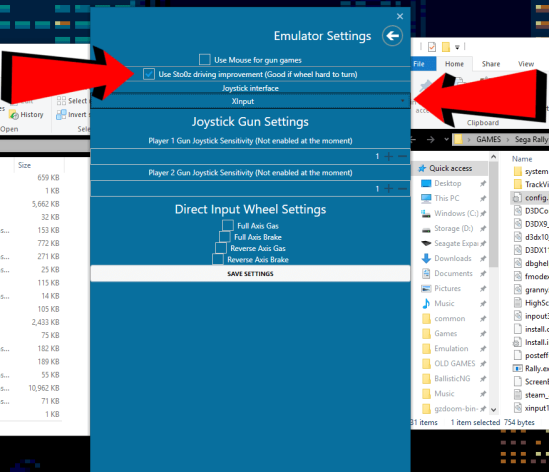
As suggested in the picture above:
- THE RED ARROW ON THE LEFT: Check the box next to ‘Use Sto0z driving improvement (Good if wheel hard to turn)’ so there is a tick there.
This setting adjusts the sensitivity of the steering in-game for Steering Wheel peripherals, but I find it fixes the sensitivity of the analog stick too. Your mileage may vary, but turn it on for now. You can always turn it back off if it doesn’t work for you.
- THE RED ARROW ON THE RIGHT: This option tells TeknoParrot which standard your chosen gamepad uses. You can select either DirectInput or XInput.
I chose XInput. Use this if you’re going to be playing with a Xbox 360/Xbox One gamepad. I am personally using a Playstation DualShock 4 gamepad via DS4Windows (a program that remaps the PS4 controller to the Xinput standard). DirectInput is an older standard, and as such, is for older PC gamepads/joysticks. If you’re rocking an older gamepad, choose DirectInput.
- With those options checked and done, go ahead and click on SAVE SETTINGS. This, uh… saves your settings:
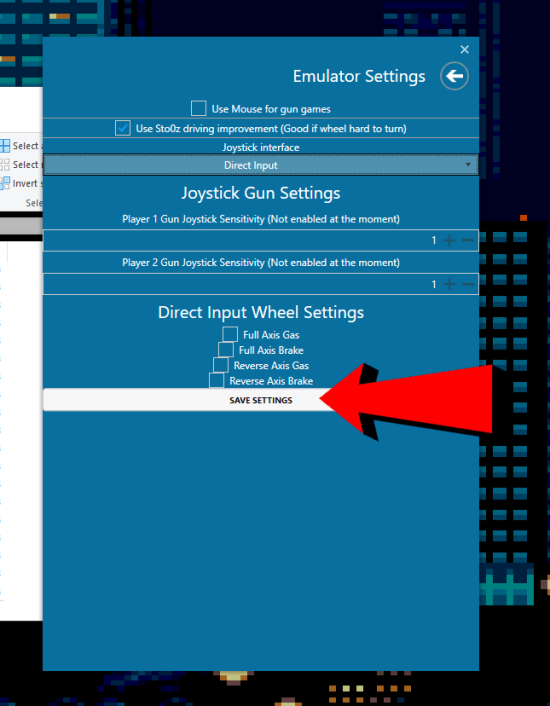
A message box should pop up. It says ‘Generation of ParrotData.xml was successful, please restart me!’ – it looks like this:
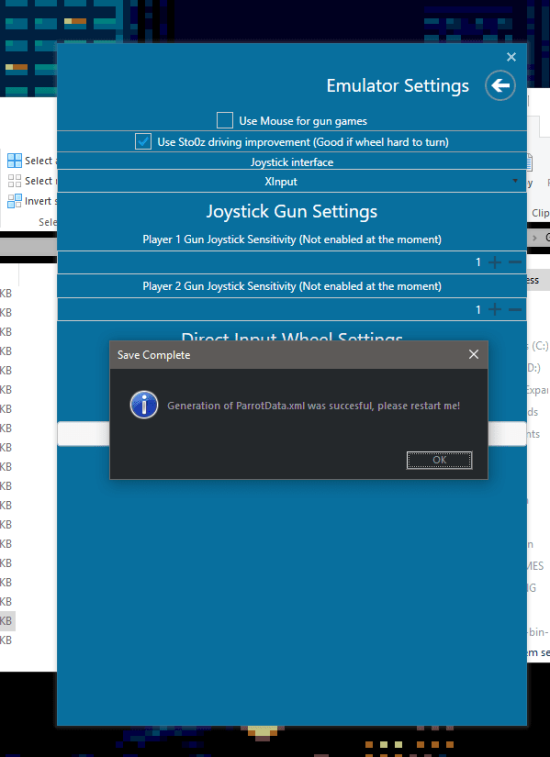
- click OK and TeknoParrot will close.
TELLING TEKNOPARROT WHERE TO FIND SEGA RALLY 3.
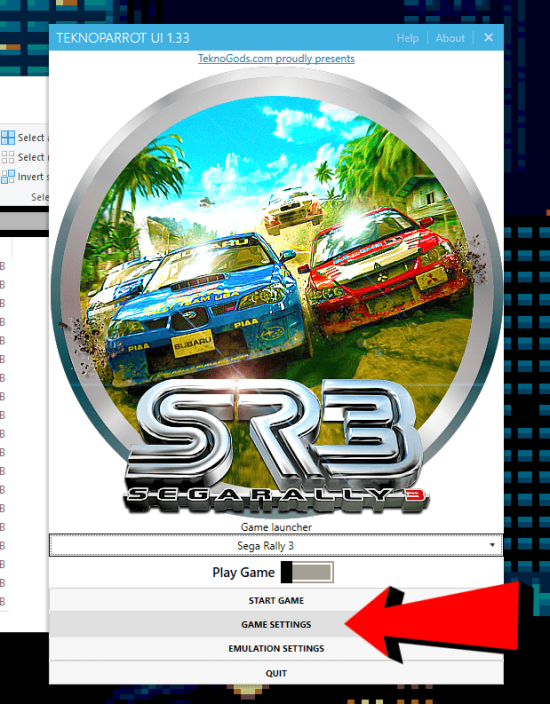
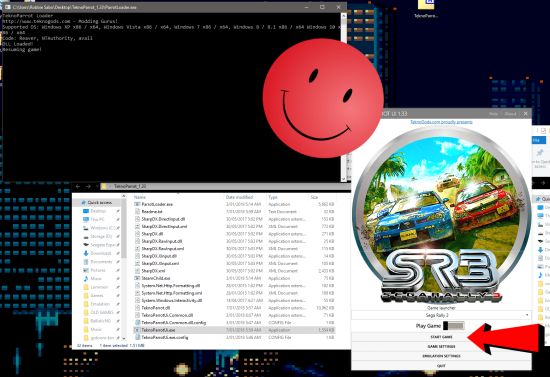
- Navigate back to your TeknoParrot_1.33 folder and, once again, double-click TekknoParrotUi.exe to open TeknoParrot. Once it’s open, click on the drop-down menu under where it says ‘Game launcher’, and scroll down until you see Sega Rally 3. Select it, and the main image will change to this, telling you that you’re changing options directly relating to SEGA Rally 3:

- Click on Game Settings:
It will take you to a screen that looks like this:
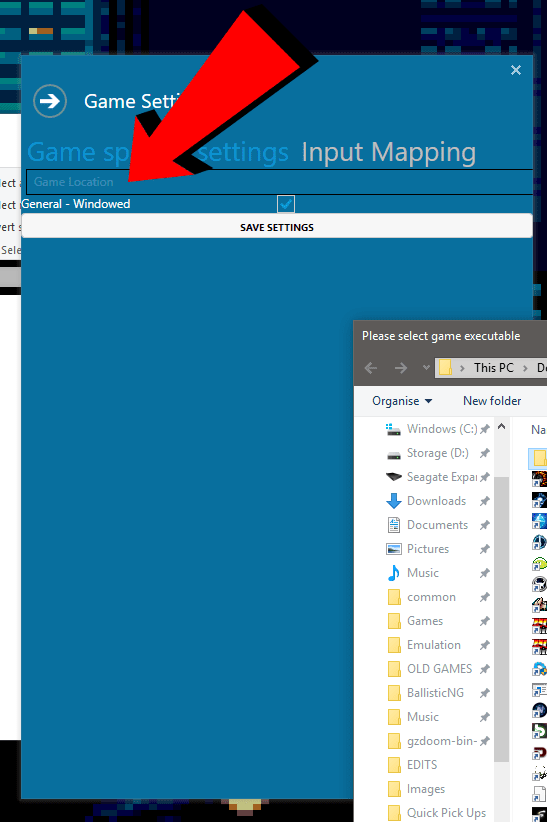
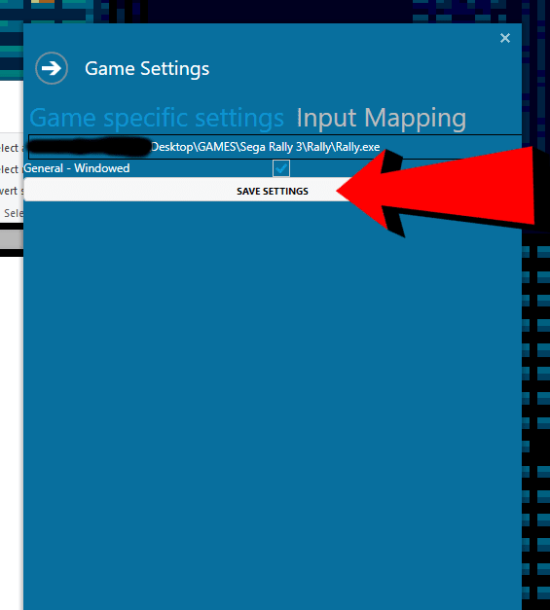
- WHERE THAT RED ARROW IS POINTED TO is where you’re going to be telling TeknoParrot the Sega Rally 3 executable is found. Click on this box, and Windows Explorer will pop up.
The file that TeknoParrot wants is called Rally.exe, and it’s found in the main Sega Rally 3 folder that you should already have. NOTE – This is the folder that contains the SEGA Rally 3 Arcade files I warned you about at the beginning of the tutorial. You’ll need to have this Sega Rally 3 file already downloaded and ready to go to continue.
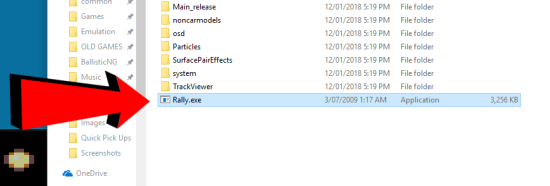
In Sega Rally 3 main folder, you should have 3 more folders – Rally, Shell and ShellData.
- Open the folder that says Rally:

Rally.exe is found here:
- Select Rally.exe and click Open:

This will take you back to TeknoParrot, and your path to Rally.exe will be displayed in the box.
- Click SAVE SETTINGS to continue:
A message box will pop up that says ‘Generation of SR3.xml was successful’ – it looks like this:
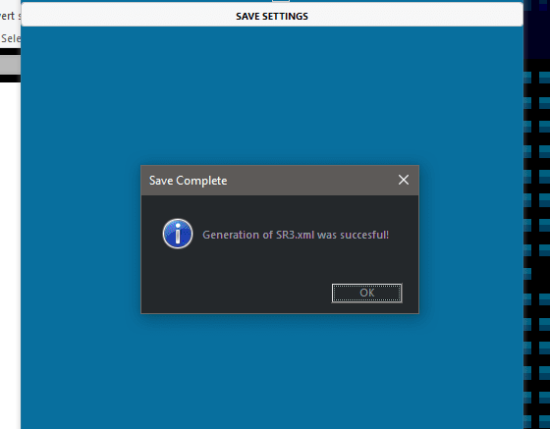
- Click on OK to continue.
SETTING YOUR SCREEN RESOLUTION FOR SEGA RALLY 3:
After telling TeknoParrot where to find SEGA Rally 3, you might want to take time out to edit the config.ini in your Sega Rally 3 folder, and set your screen resolution options to your liking.
In the main Sega Rally 3 folder, you should have 3 more folders – Rally, Shell and ShellData.
- Open the folder that says Rally:
The config.ini file looks like this:
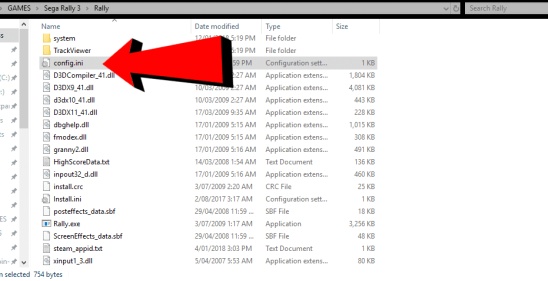
- Double-click the config.ini file, and it should open in Notepad by default.
NOTE: If you’re new to this kind of thing, you may want to make a copy of the config.ini. Place the copy in a folder/place you know to be a safe place to store things on your PC. This way, if you do muck anything up, then you’ve got the original file backed-up and ready to replace your broken one.
Once the file is open, you’ll see this:
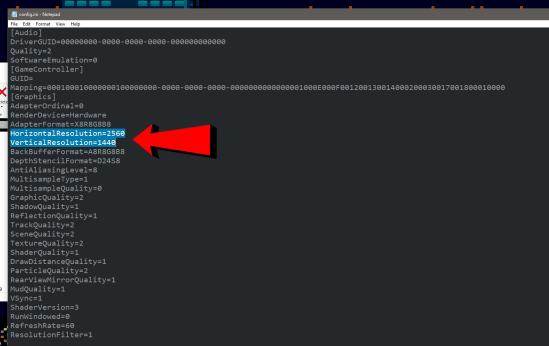
I’m using a 1440p monitor, so my native resolution is 2560×1440. So, to set up SEGA Rally 3 to use my monitor’s native resolution, I’ve set the highlighted HorizontalResolution text string to 2560 (the length in pixels) and the (also highlighted) VerticalResolution text string to 1440 (the height in pixels.
If your monitor is, say, a 1080p panel, then those two text lines should match your monitor’s native resolution of 1920×1080. You’ll be editing the file to like exactly like this:
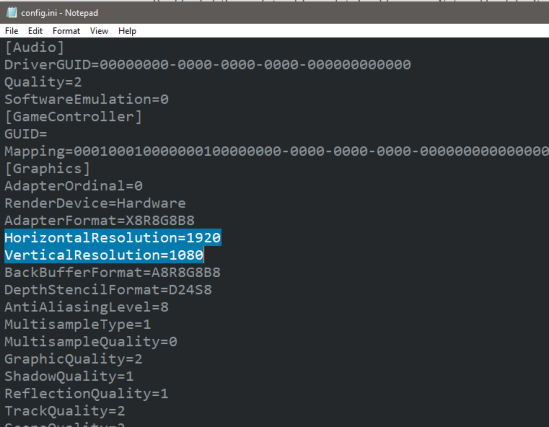
Make sure to save your changes to the config.ini before you exit/close Notepad. This will essentially apply the resolution changes you have made, and SEGA Rally 3 will run in the resolution you have specified.
Moving on.
SETTING UP YOUR GAMEPAD INPUTS:
It should go without saying that you’ll need a controller hooked up and ready to go for this section.
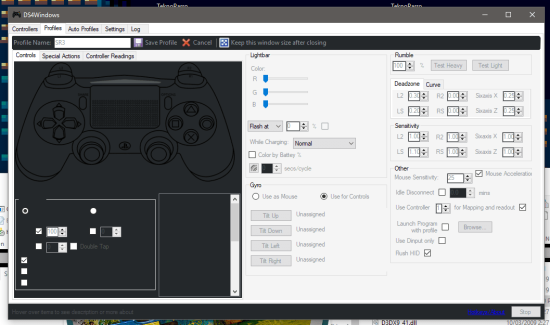
Also, SEGA Rally 3 doesn’t like the default DS4Windows settings for the analogue triggers/axis. So if you’re using a Playstation Dual Shock 4 like I am, here are the settings I use for SEGA RALLY.
***Feel free to ignore this bit if you’re using Xbox 360/Xbox One gamepads. Skip straight to the bullet-point under the image below.
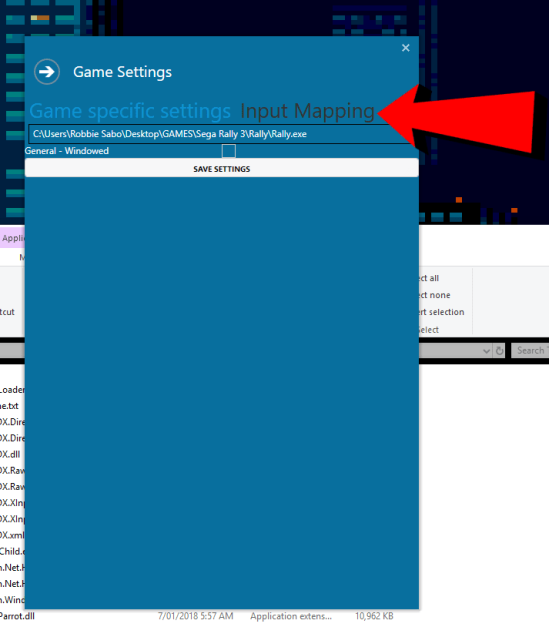
- Go back into Game Settings:
- On the Game Settings screen, click on Input Mapping:
Here, you’ll map all your desired buttons, triggers and axis as you see fit. It’s easy as pie:
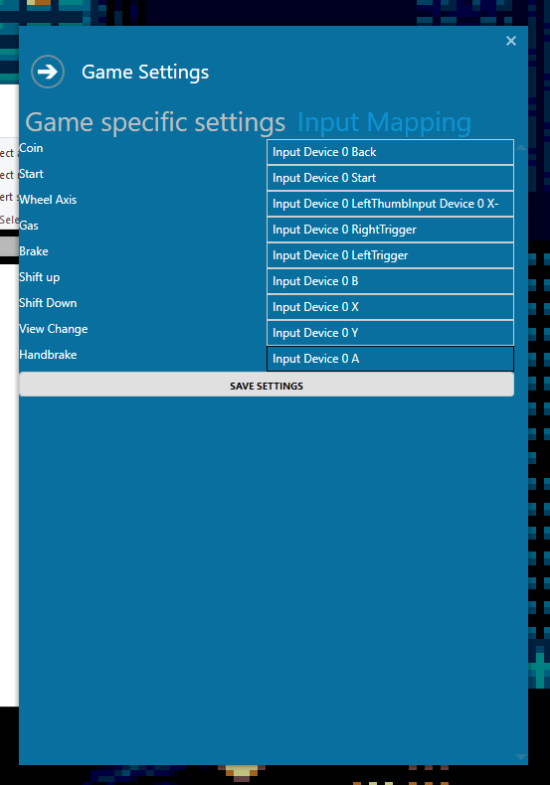
- Simply click on each input and then press the corresponding button/axis on the gamepad you’d like to use for that input function. Once you’re done, click SAVE SETTINGS. You’ll get a ‘Save Complete’ message box pop up:
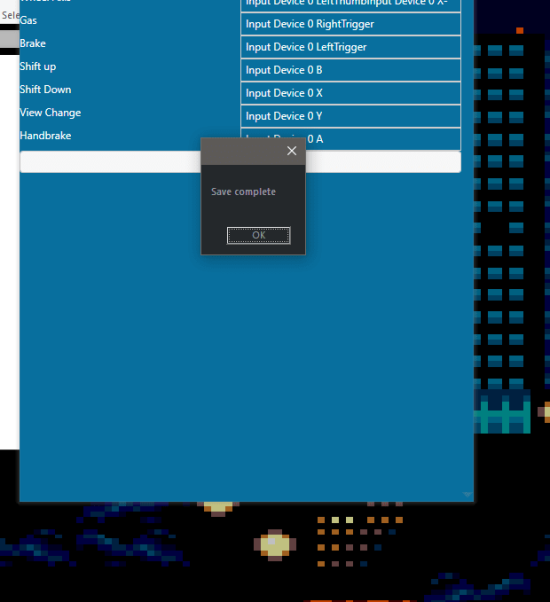
- . OK through that and head back to the main TeknoParrot screen.
THE FUN PART – GETTING YOUR SEGA RALLY 3 ON:
After all that:
- Click on START GAME. A command prompt window will pop up:
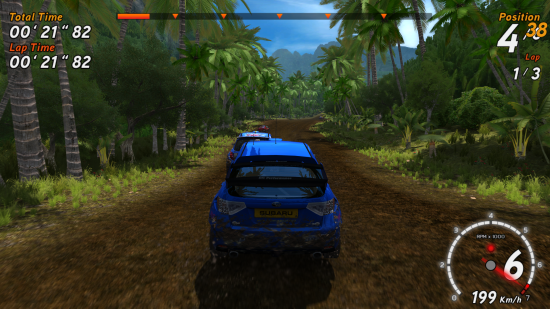
After a quick boot sequence, you’ll be in-game, and parked on the main menu – free to play the game to your heart’s content!
Well, that’s the end of that! I’ve followed this tutorial twice over, so I’m 100% confident it will work for you too. Well, maybe 99%, since PC’s can be fickle beasts at the best of times.
If you enjoyed this tutorial, and it worked for you, let me know! This took me forever to do, and I loved every second of it. If something needs improving, make sure to tell me.
See you in the next post!
Tags: arcade, Arcade Racer, Australia, Blog, Blogging, classic, coin-op, driving, emulation, Europa R, gamer, Games, gaming, guide, guides, how to, PC, racing, SEGA, SEGA Rally 3, SEGA Rally Online Arcade, tech, technical support, TeknoParrot, Tutorial, tutorials, Windows 10